Showing posts with label Christmas. Show all posts

Sunday, December 18, 2011

Mouse Clicks: A Christmas Poem


'Tis the week before Christmas, and with the click of a mouse
I find holiday inspiration for all through the house.
Recipes and gift ideas have been posted with care
Waiting for readers with whom to be shared.

My puppy is nestled all peaceful in his bed
While visions of season's eatings dance through my head.
I cozy up with hot chocolate and computer in my lap
Much too inspired for a long winter's nap.

I'll start at the beginning with hors d'oeuvres of all sorts--
Add wassail and eggnog, favorite holiday brews
And spirits will be bright, and good tidings will ensue.

We'll move on to entrees and the main courses,
And there's a multitude of options from a multitude of sources.
Pork medallions proudly center any festive spread
Complete with potatoes, greens, and home-made bread.

Let's not forget dessert, as in my mind it comes first
We have cupcakes, and cake pops with flavors that burst,
Chocolate candy cookies that couldn't be faster
Even for the novice domestic multi-tasker.

And then there's Christmas morn with the sweet aroma
Of rolls made by a pioneer woman from Oklahoma,
Served with a yummy sausage-and-egg bake
And blueberry scones that are so fun to make.

Now Baker, Homemaker, now Foodie on a mission,
On Cook, Entertainer, and all others in the kitchen,
From the top of this post, scroll down clicking links as you fall
Click away, click away, click away all!

After checking this list, and checking it twice,
I'm off to the kitchen to make something nice.
In closing I'll say, bidding you farewell tonight,
"Merry Christmas to all and to all a good bite!"


I love Christmas.  It's such a good food holiday.  These are recipes I've happened upon, and I thought I'd share-- my Christmas gift to you!  

Whatever you do, whatever you make, remember the reason for the season.

Blessings and Love,
Erin


Thursday, December 15, 2011

Holiday Cheer(s): A Simple Sew Wine Bag

I love giving food gifts during the holidays, especially when they are as easy and inexpensive as this wine gift.  I used osnaburg fabric, which I am OBSESSED with right now, to make this wine bag.  It has the neutral vibe of the ever-so-popular burlap but is much easier to work with.  It provides the perfect palette for any style of embellishment--funky printed ribbons, embroidery, buttons, etc.  You could even paint it using stencils and fabric pens (ooh, I see 'Tis the Season and Peace, Joy, Love all over this gift bag).  I decided to go with a blend between "rustic" and "chic," leaving the top edge unfinished and adding gold embellishments.  Whatever style you choose, this gift is sure to make "spirits" bright!


All materials can be found at a local craft store.

Materials for Bag:
  • Simple Sew Wine Bag Instructions--  Click here to download (Note:  Be sure pattern prints to scale.  In most printers, set scaling to none.)
  • tape
  • 1/4 yard osnaburg fabric
  • matching thread
  • fabric marking pen
  • iron and board
  • spray starch
  • 24" of 3/4" gold ribbon

Materials for Gift Tag:
  • small envelope
  • scrapbook paper
  • paper punch
  • craft gem
  • hole punch
  • 6" craft twine

Optional Embellishment:
  • gold pine cone
  • hot glue gun

1. Select the wine you'd like to gift before making your wine bag.  The included pattern works well for the following standard wine bottles:  Bordeaux, Cabernet, Small Champagne, and Burgundy.  For more information on wine bottle dimensions, click here.  The pattern includes instructions for adjusting the width or length of the bag according to the size of the wine bottle.
2. Use the step-by-step instructions to make the Simple Sew Wine Bag and place wine inside.
3. Tie a bow around the neck of the bottle using the gold ribbon.  Note:  Your finished bag will look best if you follow the rule of thirds.  I.E., the portion of the bag above the tied ribbon should be approximately 1/3 of the project.
4. To make the tag, I used a paper punch to punch out the design from scrapbook.  I then embellished it with a craft gem in the center and glued the piece onto a small envelope to hold a personal note.  Hole punch the corner and insert a 6" piece of craft twine.
5. Tie the tag around the neck of the bottle, tucking the twine underneath the ribbon.
6. Use a hot glue gun to attach the pine cone to the center of the gold ribbon.

Voila!  A perfect gift for the holidays!  Wine is made for pairing, so my next post is about a complimentary gift to pair with this one.  Stay tuned!

Happy Gift Making!

Love,
Erin

Thursday, December 1, 2011

Peace, Love, Apple Pie


'Tis officially the season of joy, gingerbread, and generosity.  The holidays are here, and you know what that means... 'tis the season for baking!  As you unpack ornaments to trim the tree, go ahead and dust off your pastry blender and rolling pin because the holidays call for some seasonal home-made sweetness.  And nothing says "I love you" quite like warm apple pie.  This one is made with a from-scratch pie crust, a blend of apples, and a double dose of holiday cheer.  Go ahead, promote a little peace, share a little love, serve a little pie.

And don't forget the vanilla ice cream y'all!

From-Scratch Double Pie Crust
Let me begin by saying, "Don't be intimidated by from-scratch pie crust!"  It's really quite easy, and you'll be so proud of yourself when you serve your finished pie.  People will probably hug you for it too.


You'll need about 30 minutes of prep time, and then at least an our (up to 24 hours) to chill the dough.  Here's the ingredients list:


2-1/2 cups all purpose flour
1/4 tsp. salt
3 T. sugar
1/4 cup shortening, cold
12 T. unsalted butter, cold and cubed
1/4 cup to 1/2 cup very cold water


1. Measure out the shortening and butter (cubed) and place in the freezer to chill for a few minutes.  Measure water and place in freezer to chill for a few minutes.  NOTE:  To achieve a flaky pie crust, it is essential that these ingredients be cold.  Otherwise, the fat will melt when forming the dough, making it easier to over-mix.
2. In a large mixing bowl, sift together the flour, salt, and sugar.
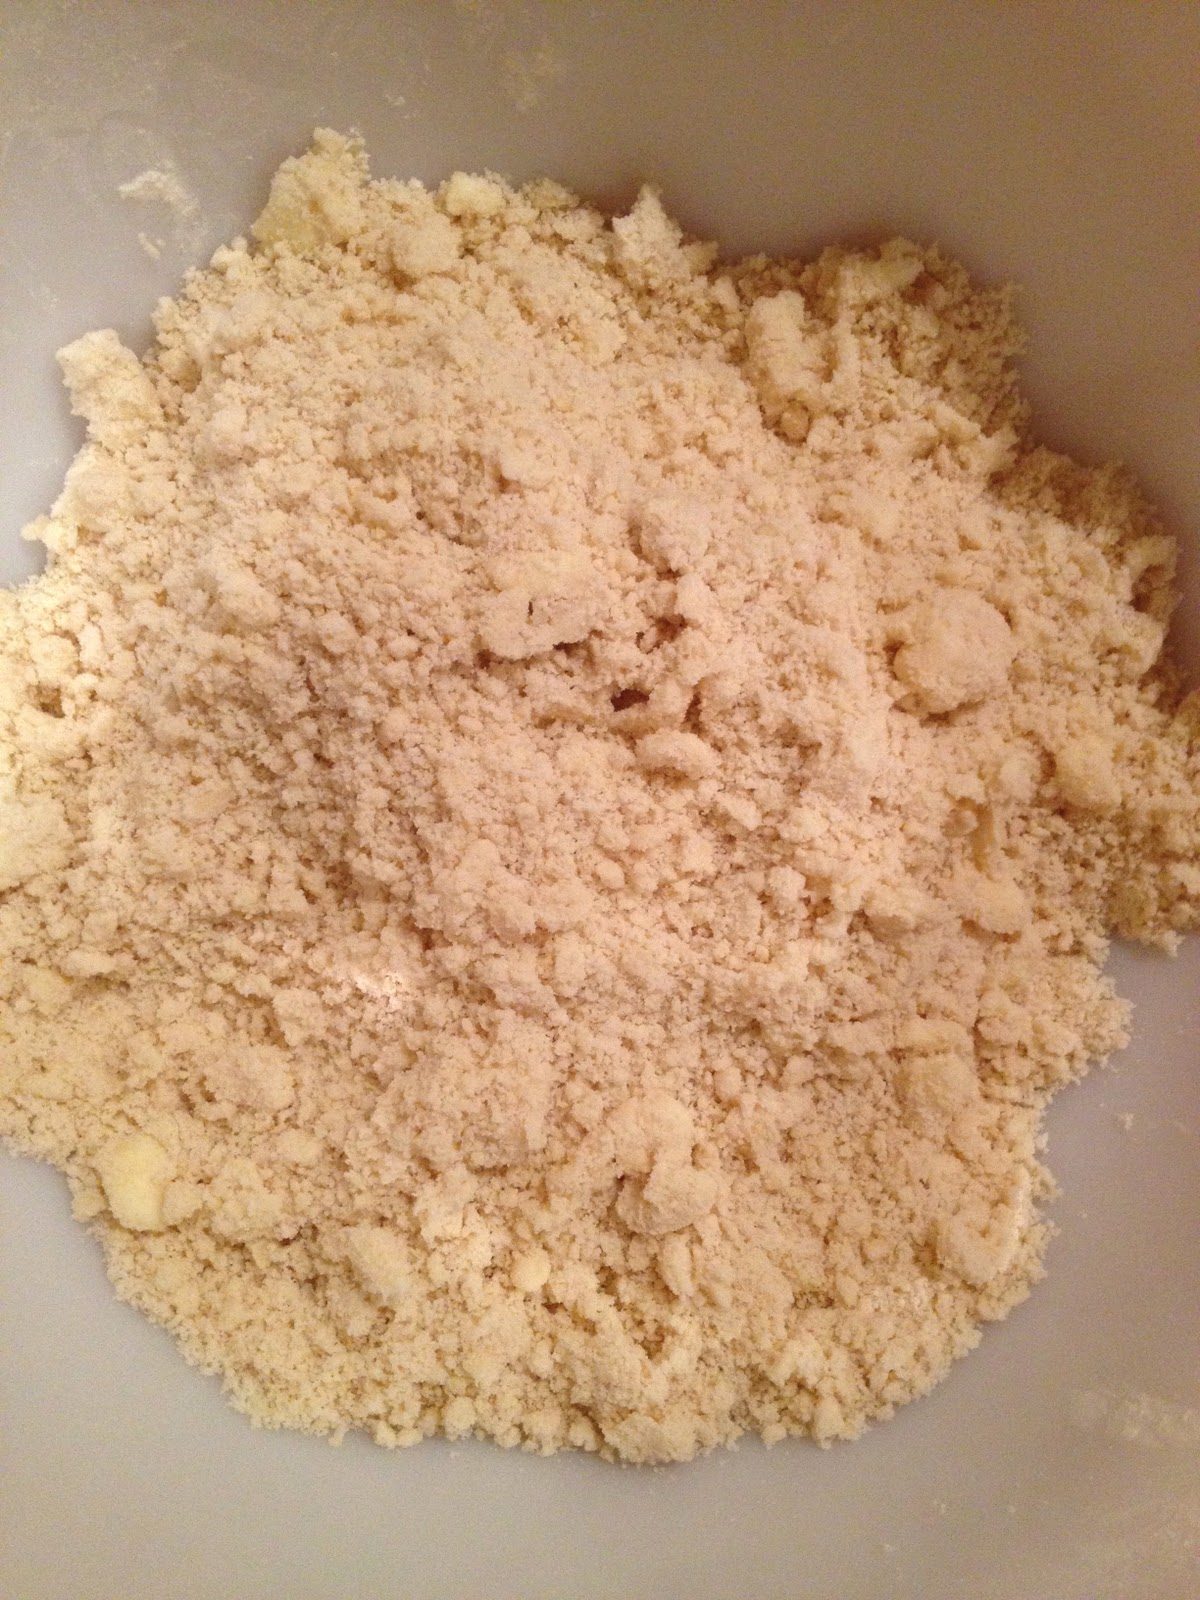
3. Cut the shortening and butter into the flour mixture using a pastry blend or two knives.  Cut fat in quickly so it doesn't begin to melt.  The resulting mixture should be crumbly, resembling coarse cornmeal.


4. Add the cold water, one tablespoon at a time, until the mixture comes together forming a dough.  NOTE:  The finished dough should neither be crumbly nor sticky-- add water gradually to prevent it from becoming sticky.
5. Bring the dough together in a ball.  When it comes together, stop working it; otherwise the dough will become tough.


6. Divide the dough into two equal balls and flatten each slightly to form a disk shape.  Wrap each disk in plastic wrap and chill in the refrigerator for 1 hour or up to 24 hours.


NOTE:  If dough becomes too hard in the refrigerator, let it rest for 15-20 minutes on the counter before rolling it out.

Old-Fashioned Apple Pie
Now it's time to prepare the pie.  You'll need the From-Scratch Double Pie Crust from above and 6 medium apples.  I used 2 Granny Smith, 2 Golden Delicious, 1 Braeburn, and 1 Fuji.  I love blending apples when baking to create a more complex overall taste.  For more information on baking apples, click here.  The remaining ingredients are listed below.

3/4 cup light brown sugar
1/4 cup all purpose flour
3/4 teaspoon ground cinnamon
1/4 teaspoon nutmeg
3 Tablespoons fresh lemon juice
3 Tablespoons butter, diced
1 Egg
Sugar, for sprinkling

1. Position rack in the bottom third of the oven and preheat to 425 degrees F.  
2. Mix together brown sugar, flour, cinnamon, and nutmeg in a small bowl.
3. Peel, core, and thinly slice the apples.


4. Place apples in a large mixing bowl, sprinkle with lemon juice, and toss to coat.
5. Stir in the sugar mixture to evenly coat the apples.


6. On a lightly floured surface, roll each disk of dough out into a 10"-11" circle to make a 9" pie.


7. Press one pie crust into the bottom of a 9" pie plate.  Using scissors or a knife, trim the bottom dough to make it even with the edge of the plate.


8. Mound the apple filling into the dough-lined plate.  Scatter dices of butter over the filling.


9. Using a sharp knife, cut an even number of strips form the remaining rolled out dough.  Transfer every other strip to the pie top and weave in the lattice by folding every other strip back onto itself and laying another strip perpendicularly.  Fold the strips back across and repeat until completed.


10. Trim the overhanging edges of dough to about 1/2" wider than the bottom pie crust.  Tuck that overhang under the bottom crust and pinch to seal.


11. In a small bowl, whisk the egg and add 1 Tablespoon of water.  Brush the top of the pie with egg wash and sprinkle with sugar.
12. Loosely wrap aluminum foil strips around the edges of the pie to prevent burning.
13. Bake for 45-55 minutes, removing foil strips for the last 15 minutes of baking.  NOTE:  If the top of the pie begins to brown too quickly,  place a piece of foil over the whole crust for part of the baking time to shield.
14. Cool pie on a rack for at least an hour before slicing.


Serve with a scoop of vanilla ice cream (garnish with a mint leave if you really want to impress!).


To print recipe, click here.

Peace and Love and Happy Baking!

Love,
Erin