Sunday, October 28, 2012
Spiced Pumpkin Cheesecake Brownies
I've experimented with many pumpkin flavored desserts the past few years (You may remember this Pumpkin Pecan Cheesecake from last Thanksgiving), but have not yet tackled pumpkin brownies... until now.
It's no secret I love chocolate, and I love cheesecake. A few years ago I made David Lebovitz's Cheesecake Brownies, and they were to-die-for. In the spirit of the season, I decided to re-create this recipe incorporating pumpkin flavor. Here's my recipe for Spiced Pumpkin Cheesecake Brownies:
Ingredients:
Brownie Mixture:
6 T. unsalted butter, cut into pieces
4 oz. semisweet chocolate, coarsely chopped
2/3 cup sugar
2 eggs, at room temperature
1/2 cup flour
1 T. cocoa powder
1/8 tsp. salt
2 tsp. cinnamon
1 tsp. vanilla extract
1/2 cup chocolate chips
Pumpkin Cheesecake Mixture:
6 oz. cream cheese, softened
1 egg, at room temperature
1/3 cup sugar
2 T. flour
1/2 cup canned pumpkin
1/4 tsp. vanilla extract
1/2 tsp. cinnamon
1/4 tsp. ground ginger
1/4 tsp. ground cloves
1. Line a 9" square baking pan with two layers of aluminum foil (bottom and sides). Lightly grease with non-stick cooking spray.
2. Preheat oven to 350 degrees.
3. Melt butter and chocolate in a medium saucepan over low heat. Stir to blend.
4. Remove melted chocolate from heat and beat in sugar and 2 eggs.
5. Mix in flour and next 3 ingredients, then add the vanilla and chocolate chips. Pour into prepared pan and smooth to even.
6. In a separate bowl, beat together the cheesecake mixture ingredients.
7. Spoon the cheesecake mixture over the brownie mixture. Then, use a dinner knife to swirl the batters gently.
8. Bake for 35 minutes (a toothpick inserted in the middle should come out clean).
9. Let cool in pan on a cooling rack for 10-15 minutes. Then, gently lift foil out of pan and peel it away.
10. Cut brownies into squares.
These will store in an airtight container for a few days... that is, if they last that long :)
Happy Fall Y'all!
Monday, September 24, 2012
Chocolate Peanut Butter Triple-Layer Cheesecake
Has it really been over a month since my last post???
I guess it's a fact that time flies when you're
Beneath the coating of chocolate ganache were alternating layers of cheesecake flavors. It was the perfect blend of classic cheesecake, chocolate, and peanut butter and the perfect dessert for my non-cake-loving husband. He'll pass up cakes, cupcakes, and brownies, but I've NEVER seen him turn down cheesecake, and he LOVED this one.
I'll admit, I was a little intimidated about trying to re-create it. But being the culinary experimentalist (not to mention dessert-lover) that I am, I put my fears aside, gathered up lots of cheesecake recipes, and began crafting my own. And here it is...
Graham Cracker Crust
1-1/2 cups graham cracker crumbs (about 20 cracker "squares")
1 T. sugar
6 T. unsalted butter, melted
Cheesecake Filling:
4 (8 oz.) packages cream cheese, softened
1 cup sugar
4 large eggs, at room temperature
1/2 cup sour cream
2 tsp. vanilla extract
3 oz. bittersweet chocolate
1/3 cup creamy peanut butter
Ganache Topping:
4 oz. bittersweet chocolate, finely chopped
1/2 cup heavy cream
Garnish (I had these candies on hand):
Peanut butter cups, coarsely chopped
chocolate chips
1. Preheat oven to 350 degrees. Grease the bottom and sides of a 9" springform pan with cooking spray; tightly wrap the sides of the pan with two layers of aluminum foil. Combine graham cracker crumbs, sugar, and butter in a bowl until crumbs are evenly moistened. Press into bottom and 1-1/2" up the sides of prepared pan. Bake 10 minutes; let cool on a wire rack.
2. In a large bowl, beat cream cheese on medium-high speed until light and fluffy. Gradually beat in sugar until smooth. Reduce speed to medium and beat in eggs, one at a time, until just blended. Beat in sour cream and vanilla.
3. Equally divide the batter into three separate bowls. Set one bowl of batter aside.
4. In a microwave safe dish, melt chocolate in 30-second intervals, stirring until smooth. To one of the remaining two bowls of batter, stir in melted chocolate.
5. To the remaining bowl of batter, beat in peanut butter until smooth.
6. Spoon peanut butter batter into prepared crust. Smooth the surface if necessary. Over the peanut butter batter, pour the chocolate batter and gently smooth. Over the chocolate batter, pour the plain batter.
7. Place cheesecake in a larger baking pan with sides. Carefully pour enough hot water into larger pan to reach 1" up the sides of the springform pan. Bake in preheated oven for 1 hour. Turn oven off and let cheesecake stand in oven, with door slightly ajar, for 15 minutes.
8. Remove cheesecake from oven and water bath; remove foil. Gently run a knife around the edges to loosen from sides of pan (do not remove from pan). Cool completely on a wire rack for about one hour. Cover and refrigerate for 6 hours or overnight.
9. To remove the cheesecake from the springform pan, wrap a damp, warm towel around the sides of the pan to loosen the cracker crust. Gently remove the sides from the springform pan.
10. To make the ganache:
Finely chop 4 ounces of bittersweet chocolate and set aside in a bowl. Bring 1/2 cup of heavy cream to a simmer over medium heat. Pour simmering cream over chocolate and let sit for 1-2 minutes, melting chocolate, then stir until smooth. Pour ganache over cheesecake and use a spatula to smooth. Sprinkle chopped peanut butter cups and chocolate chips around the rim, if desired. Refrigerate for about 20 minutes, or until ganache hardens.
I sure am glad I made time for this dessert! And I think Brad is pretty happy about it too.
Enjoy!!!
Sunday, January 8, 2012
Blue Velvet Valentine Cupcakes
I recently received this image in an email with the subject line "Dare to be different."

It inspired me to try something different for Valentine's this year-- something different from all the shades of red and pink (which I still love, and will post about later). Red velvet treats are very popular around Valentine's Day, but I wanted to try something new (and blue!). I borrowed Heather's, from Sprinkle Bakes Blog, secret for creating the perfect shade of blue. Crowning the piped cream cheese frosting with molded hearts sends the message "I love you" like a true blue Valentine!

I love the part of a recipe that says "set aside." After completing something, you set it aside to move on to the next step... it gives me the same satisfaction as checking off something on my to-do list. So I'll start my recipe with the candy molding. You can mold the candy hearts and set them aside for up to a few weeks in an airtight container.

If you have never molded candy before, you are in for a (sweet) treat! It's so easy, and there are endless possibilities for creating candies as stand-alone goodies or as decorations for other desserts, as we will be doing.
For candy molding, you'll need a few tools of the trade, all of which are most likely available at your local craft store. First, you'll need the best part: the candy melts. These are little disks of candy that come in a variety of colors and flavors and are easily melted to be re-shaped into your candy molds. To create my hearts, I used the following colors:
You'll also need the actual molds. They are made of lightweight plastic, easy for bending you can pop out the candies when ready. Click here to view Wilton's collection of candy molds.
When working with large molds, you may place the melted candy/chocolate melts in the mold with a spoon. However, for smaller shapes, I highly recommend candy making squeeze bottle. They cost about $1 to $2 at your local craft or baking store and make working with small molds so much easier and less messy.
Instructions for melting the candy disks are included on the back of the packaging. If using the squeeze bottles, you can melt the candy disks directly in the bottle and then attach the cap, and you're ready to begin. I like to work from the center of the mold and "swirl" the tip of the cap. The melted candy will be pushed from the center to the edges. Here's a quick video demonstrating this:
Chill the candy molds in the freezer for about 15 minutes. When set, pop them out of the molds and set aside.
To make the cupcakes you'll need the following ingredients:
2 cups sugar
2 sticks butter, softened
2 eggs
1 T. cocoa powder
1 T. Wilton royal blue food coloring
1 small dab of Wilton violet gel food coloring
2-1/2 cups cake flower
1 tsp. salt
1 cup buttermilk
1 tsp. vanilla extract
1/2 tsp. baking soda
1 T. vinegar
Preheat the oven to 350 degrees F. Line cupcake pans with paper or foil liners. NOTE: Because the batter is so dark, opaque liners look the best (I liked the way the silver liners turned out).
In a large mixing bowl, cream the sugar and butter until fluffy. Add the eggs, one at a time, mixing well after each addition.
Now it's time to blend the food colorings with the cocoa. The secret to creating the blue hue pictured is the right blend of food coloring. Use 1 T. of Wilton royal blue and a small dab of Wilton violet. The addition of violet keeps the batter from tinting a greenish-blue color when baked.
Add these two together...

... and get the perfect shade of blue!

In a separate small bowl, mix cocoa and food colorings to form a paste.
Sunday, December 18, 2011
Mouse Clicks: A Christmas Poem
Whatever you do, whatever you make, remember the reason for the season.
Thursday, December 1, 2011
Peace, Love, Apple Pie
'Tis officially the season of joy, gingerbread, and generosity. The holidays are here, and you know what that means... 'tis the season for baking! As you unpack ornaments to trim the tree, go ahead and dust off your pastry blender and rolling pin because the holidays call for some seasonal home-made sweetness. And nothing says "I love you" quite like warm apple pie. This one is made with a from-scratch pie crust, a blend of apples, and a double dose of holiday cheer. Go ahead, promote a little peace, share a little love, serve a little pie.
And don't forget the vanilla ice cream y'all!
From-Scratch Double Pie Crust
Let me begin by saying, "Don't be intimidated by from-scratch pie crust!" It's really quite easy, and you'll be so proud of yourself when you serve your finished pie. People will probably hug you for it too.
You'll need about 30 minutes of prep time, and then at least an our (up to 24 hours) to chill the dough. Here's the ingredients list:
2-1/2 cups all purpose flour
1/4 tsp. salt
3 T. sugar
1/4 cup shortening, cold
12 T. unsalted butter, cold and cubed
1/4 cup to 1/2 cup very cold water
1. Measure out the shortening and butter (cubed) and place in the freezer to chill for a few minutes. Measure water and place in freezer to chill for a few minutes. NOTE: To achieve a flaky pie crust, it is essential that these ingredients be cold. Otherwise, the fat will melt when forming the dough, making it easier to over-mix.
2. In a large mixing bowl, sift together the flour, salt, and sugar.
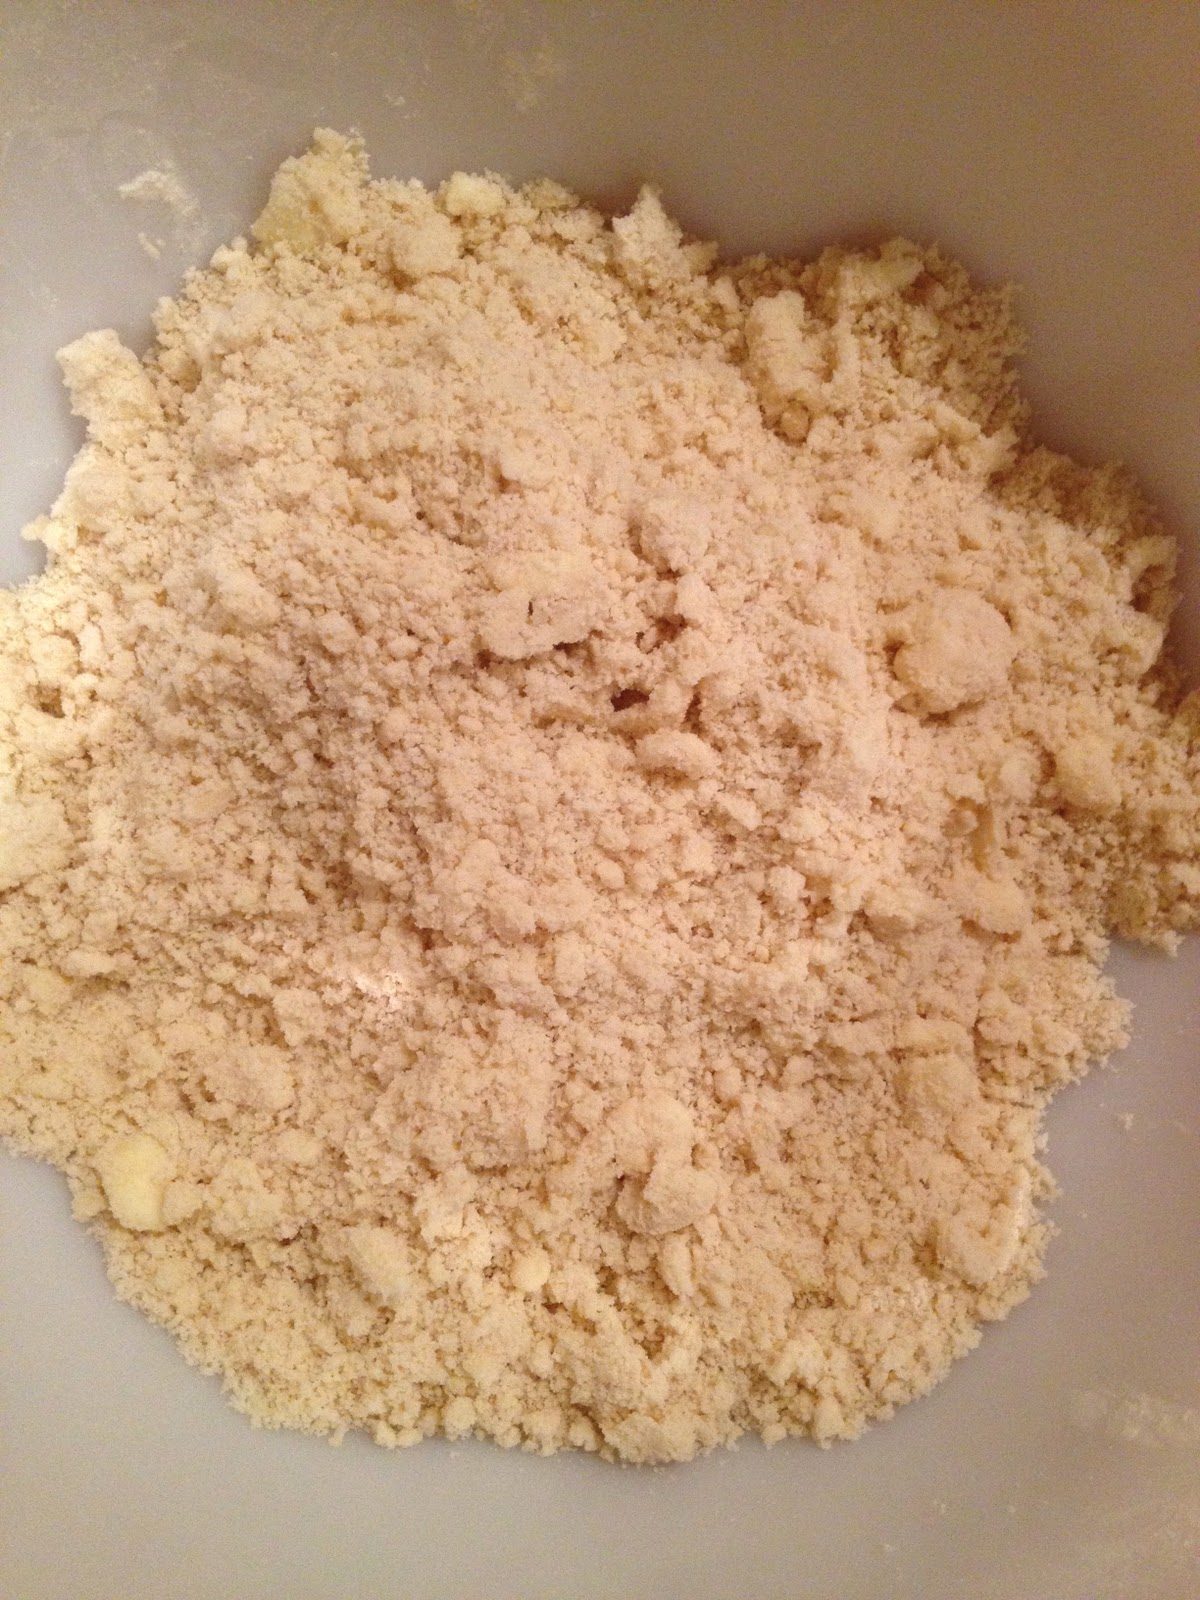
3. Cut the shortening and butter into the flour mixture using a pastry blend or two knives. Cut fat in quickly so it doesn't begin to melt. The resulting mixture should be crumbly, resembling coarse cornmeal.
4. Add the cold water, one tablespoon at a time, until the mixture comes together forming a dough. NOTE: The finished dough should neither be crumbly nor sticky-- add water gradually to prevent it from becoming sticky.
5. Bring the dough together in a ball. When it comes together, stop working it; otherwise the dough will become tough.
6. Divide the dough into two equal balls and flatten each slightly to form a disk shape. Wrap each disk in plastic wrap and chill in the refrigerator for 1 hour or up to 24 hours.
4. Place apples in a large mixing bowl, sprinkle with lemon juice, and toss to coat.
5. Stir in the sugar mixture to evenly coat the apples.
7. Press one pie crust into the bottom of a 9" pie plate. Using scissors or a knife, trim the bottom dough to make it even with the edge of the plate.
9. Using a sharp knife, cut an even number of strips form the remaining rolled out dough. Transfer every other strip to the pie top and weave in the lattice by folding every other strip back onto itself and laying another strip perpendicularly. Fold the strips back across and repeat until completed.
10. Trim the overhanging edges of dough to about 1/2" wider than the bottom pie crust. Tuck that overhang under the bottom crust and pinch to seal.
11. In a small bowl, whisk the egg and add 1 Tablespoon of water. Brush the top of the pie with egg wash and sprinkle with sugar.
12. Loosely wrap aluminum foil strips around the edges of the pie to prevent burning.
13. Bake for 45-55 minutes, removing foil strips for the last 15 minutes of baking. NOTE: If the top of the pie begins to brown too quickly, place a piece of foil over the whole crust for part of the baking time to shield.
14. Cool pie on a rack for at least an hour before slicing.
Serve with a scoop of vanilla ice cream (garnish with a mint leave if you really want to impress!).
To print recipe, click here.
Peace and Love and Happy Baking!
Love,
Erin
Sunday, November 27, 2011
Pumpkin Pecan Cheesecake

I was talking to a friend a couple days ago who told me her family never deviates from their Thanksgiving menu. Each year, they celebrate with the very same dishes. They may add to the traditional spread, but never replace or, heaven forbid, remove an item from the pre-established menu.
Similarly, my family has a few “old faithfuls” and we always stick to the usual suspects…. Turkey, dressing, cranberry salad, sweet potato casserole… but they most often have a new spin. One item that does change each year is the dessert (probably because I normally volunteer to make it, and I like changing it up a bit).
This year, I prepared a Pumpkin Pecan Cheesecake. Everyone knows pumpkins and pecans are classic Thanksgiving bounty-- we often see them in pies during the holidays. This dessert takes the natural sweet flavor of pumpkin and wraps it in the nutty flavor of a pecan-graham cracker crust. Then, a creamy praline topping is poured over the top. Yum! If you think this recipe sounds and looks good, wait until you taste it! See the recipe and tips below.
Perhaps I won’t make a new dessert next Thanksgiving… yes, I declare this one a keeper!
Pumpkin Pecan Cheesecake
Adapted from Southern Living
Hands-On Time: 30 min.
Total Time (including baking and cooling): approximately 12 hours
Servings: 12
1-3/4 cups graham cracker crumbs
1/3 cup finely chopped pecans
3 Tbsp. light brown sugar
½ tsp. pumpkin pie spice
1 stick melted butter
4 (8 oz.) packages cream cheese, softened
1 cup sugar
1 tsp. vanilla
4 eggs
1-1/2 cups canned pumpkin
1-1/2 Tbsp. lemon juice
For the Crust:
1. Preheat oven to 325 degrees F. Combine cracker crumbs, chopped pecans, brown sugar, and pumpkin pie spice with a fork. Stir in melted butter.
2. Press mixture on bottom and sides (1-1/2” up) of a 9” springform pan.
3. Bake 8 to 10 minutes or until lightly browned.
For the filling:
1. Beat cream cheese until smooth with a stand mixer. Add sugar and vanilla, beating until smooth.
2. Add eggs, one at a time, beating until blended after each addition.
3. Add pumpkin and lemon juice, beating until blended.
4. Pour batter into prepared crust.
5. Bake at 325 degrees F for 1 hour to 1 hour and 10 minutes. Turn oven off and let cheesecake stand in oven, with door closed, for 15 minutes.
6. Remove cheesecake from oven and gently run a knife around the edges to loosen from sides of pan (do not remove from pan). Cool completely on a wire rack for about 1 hour.
7. Cover and chill for 8 to 24 hours.
8. Remove sides and bottom of pan and transfer cheesecake to serving plate.
9. Prepare Praline Topping and immediately pour slowly over top of cheesecake. 10. Garnish with coarsely chopped pecans.
Praline Topping
1 cup firmly packed brown sugar
1/3 cup whipping cream
½ stick butter
1 cup powdered sugar, sifted
1 tsp. vanilla
Bring brown sugar, whipping cream and butter to a boil in a 1-qt. saucepan over medium heat, stirring often. Boil, stirring occasionally, for a minute. Remove from heat and gradually whisk in powdered sugar and vanilla until smooth. Let stand 5 minutes, whisking occasionally. Immediately pour over cheesecake.